When you seal pavers then you take an essential step to secure the beauty of your exterior. Outdoor pavers often have to face tough weather conditions along with other environmental factors. They face daily abuse such as heavy foot traffic, direct sun exposure, and chips and cracks. These can heavily impact the pavers. If you don’t take proper steps to maintain then the most durable pavers can be damaged.
This is why opting for regular sealing is crucial. Some outdoor pavers may require little to no sealing than the other paver types. Seal pavers to keep them in pristine condition for years to come. Sealing pavers shouldn’t be a daunting task with the right tools and equipment. In this post, we will guide you on sealing pavers in the most convenient way possible.

Tools for How to Seal Pavers
Before you start sealing the pavers, gather the essential tools to make things easier.
Tools
- Earmuffs
- Paint roller with an extension pole
- Outdoor broom
- Gloves
- High-pressure washer and hose attachment
- Safety glasses
- Bucket
- Dust mask
- Paint tray
Materials
- Stone and paving sealer
- Cloth or rag
- Sugar soap
- Scouring pad
Step-by-Step on How to Seal Pavers
Paver sealing may look daunting initially, but it can be a rewarding experience. Here is what you should do:
Clear The Surface
Step 1 of How to Seal Pavers:
Once you have collected everything, you will want to remove everything from the paver surface. From outdoor furniture to planters or potted plants, to any obstacle that may interrupt the cleaning. Also, nearby surfaces should be covered with tarps such as grass and flowers to keep them secured from the chemicals. Make sure the surface is all clear with nothing to be damaged by paver sealers.
Clean The Surface
Step 2 of How to Seal Pavers:
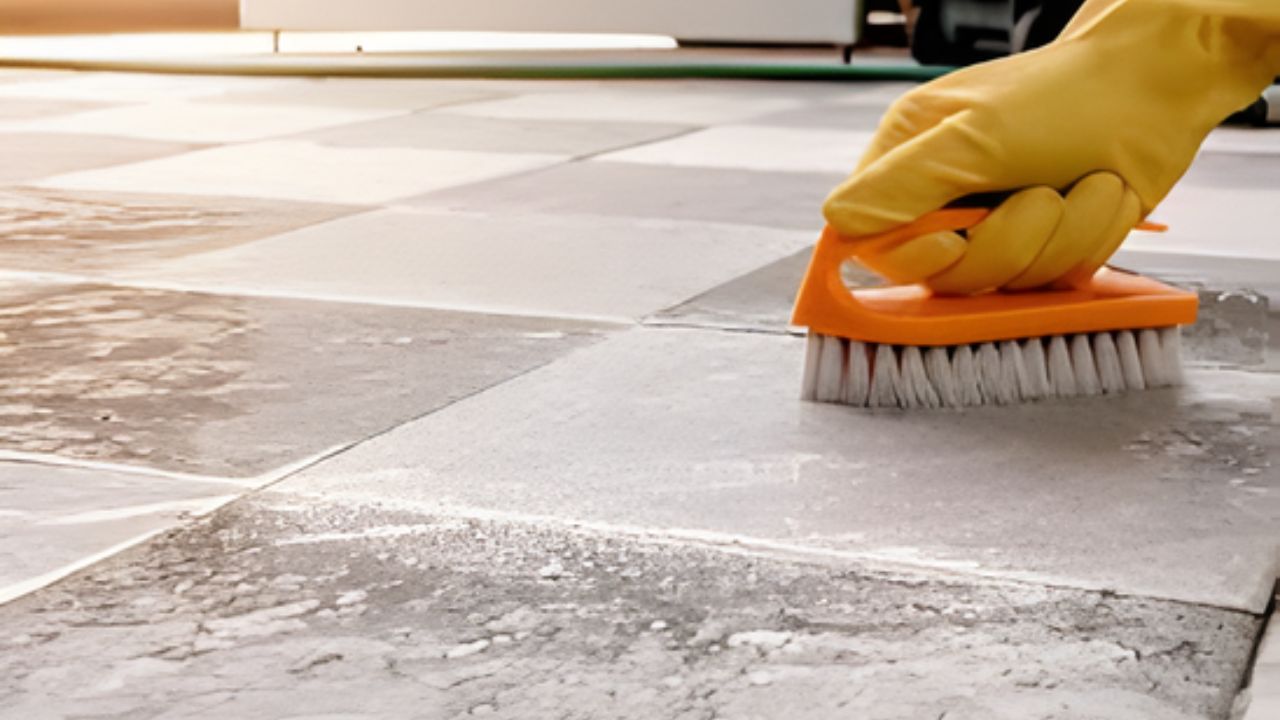
Once the paved surface is clear, you will need to clean the surface. You can use a soft-bristled brush or broom to clean the surfaces that are designated, such as natural stone pavers (Travertine, Marble, and Sandstone) Any regular broom will work on pavers like porcelain pavers. If there are any stains on the pavers, then you should work on them before you seal the pavers. Once the sealant is applied, the stained surface will be sealed underneath as well. So, make sure to clean thoroughly and remove any stains to seal only the shiny pavers. Read also our guide on how to clean pavers.
Power Wash (If Required)
Step 3 of How to Seal Pavers:
If the outdoor pavers haven’t been washed for quite some time then it is better to give them a powerwash treatment. This will clean any dust, grime, and dirt accumulation and residue. Also, powerwashing will make the surface smooth enough to apply sealant conveniently, saving you a lot of time. Once you powerwash them, let them dry completely before starting to work.
A working method is using a piece of plastic tape over a section of paver for two hours. If moisture accumulates beneath the plastic, the area will be excessively damp for sealing. Subsequently, allow it to dry for an additional day and conduct the test once more. If utilizing concrete pavers, you may need to apply an etcher before sealing them.
Apply The Sealer
Step 4 of How to Seal Pavers:
Once the surface is completely dry and clean, it is time to apply the sealer. First, you will need to select a sealer that is compatible with the stone surface. You can test a small area to check if there are any unwanted reactions or color changes on the surface. You can Aqua Treatment Sealer or Hidro SST Natural Stone Sealer for outdoor paver sealing.


Apply the stone sealer with a low-pressure sprayer, roller, or brush evenly. You should follow the manufacturer’s instructions for the recommended application method and coverage area. Start working in small sections and make sure to apply it evenly. Don’t pour it too much on a single surface. Backrolling with a roller can help remove excess sealer and will assure you an even and uniform finish.
Once the sealant is applied, allow it to dry completely. The time will be mentioned by the manufacturers. When the sealer is applied, avoid any foot traffic and water exposure. Let it sit completely and dry. Once it is dried completely, check the sealant application by pouring some water on the surface. If water stays on the surface, then it has worked. However, if the water is absorbed into the surface then you need to seal pavers again.

Specific Considerations for Different Paver Types
If you want to seal pavers, then you should know that not all the pavers are the same. There are some key considerations for different pavers types and their sealant types.
| Paver Type | Ideal Sealer Type | Benefits |
| Concrete Pavers | Acrylic Sealer | Provides UV protection, and stain resistance, and enhances color with a choice of gloss levels. |
| Penetrating Sealer | Natural look penetrates to protect from water and stains without altering appearance. | |
| Natural Stone Pavers | Penetrating Sealer | Maintains natural texture and color, is water-repellent, and protects from freeze-thaw damage. |
| (e.g., Travertine, Limestone, Sandstone) | Enhancing Penetrating Sealer | Subtle color enhancement while protecting against water and stains. |
| Porcelain Pavers | Invisible Penetrating Sealer | Adds stain and mold resistance without affecting the natural look of the porcelain. |
| Brick Pavers | Film-Forming Acrylic Sealer | Adds shine, enhances color, and provides surface protection. |
| Penetrating Silane-Siloxane Sealer | Matte finish protects against water and oil stains without altering the brick texture. | |
| Slate Pavers | Enhancing Sealer | Deepens color for a rich appearance while providing water and stain resistance. |
| Natural-Look Penetrating Sealer | Weather-resistant protection without changing the slate’s matte, natural look. |
Now you should have an idea regarding different sealer types and their applications. Read also our blog on How to seal outdoor marble pavers.
Additional Considerations Before How to Seal Pavers
There are some further considerations before sealing pavers, such as:
Weather conditions:
Apply the sealer on a dry and sunny day. Don’t work in a hot, sunny, and high-temperature environment. Make sure the humidity is under control.
Ventilation:
Make sure proper ventilation is available, as some sealers may have strong fumes that may make you feel dizzy.
Safety Gears:
Wear gloves, eye protection, and other protective gear as recommended by the manufacturer.
Maintenance:
Regularly clean the sealed pavers to maintain their appearance and the effectiveness of the sealer. Reapply the sealer as needed, typically every 1-2 years.

Final Thoughts
If you want to seal pavers by yourself, then this post will help you in every essential step so you can get the best result. Sealing the pavers is not so har,d but doing it with precision and the right results requires skills and time. Make sure you have plenty of time to perform sealing by yourself, and the area will not be used until the sealer is dry. Always choose the right type of sealant according to the paver types, as this will determine how well your pavers are secured. Follow this guide for the best experience regarding sealing pavers.