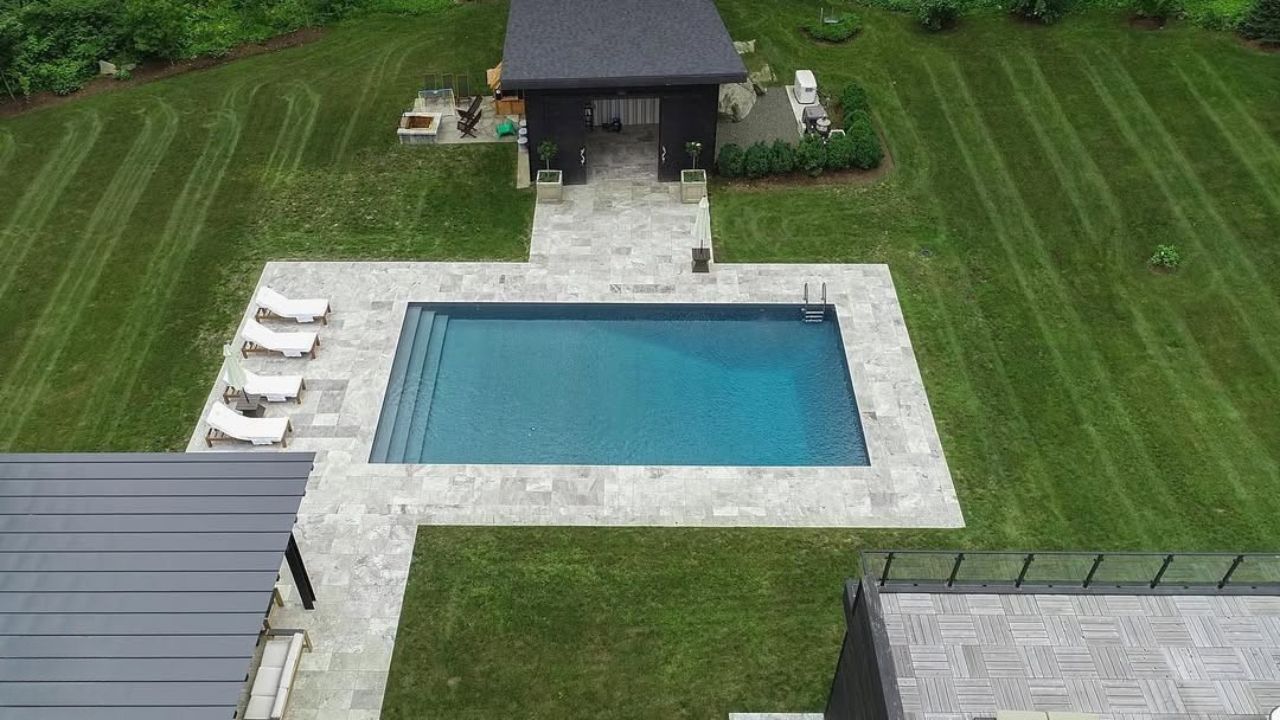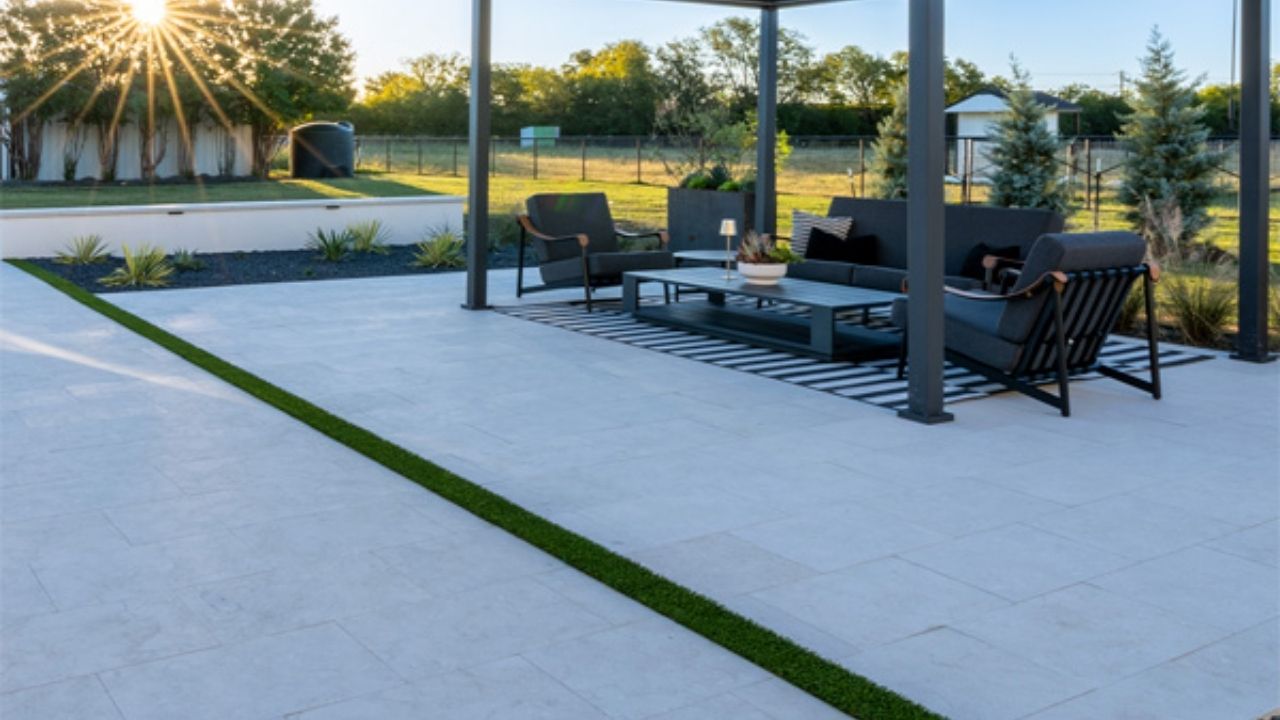
Limestone pavers feature a beautiful natural look that concrete cannot create. The surface feels cooler and smoother underfoot, and it ages gracefully. This is why it is well-suited for patios, walkways, and courtyards. However, its natural beauty requires extensive responsibility as well.
Limestone is different from porcelain or concrete. The surface is porous, which absorbs moisture. It is also sensitive to acids and relies on the proper base preparation for long-term stability. When installers treat limestone like a manufactured paver, problems follow. Here is our simple step-by-step guide so you will learn how to install limestone pavers the right way.
What Tools and Materials Do You Need to Install Limestone Pavers?
Before installing limestone pavers, prepare yourself with the following tools and materials.
Materials
- Limestone pavers (consistent thickness preferred)
- Crushed stone base (¾-inch minus)
- Bedding material (washed concrete sand or stone dust)
- Edge restraints
- Joint material (polymeric sand or stone-safe mortar)
- Penetrating stone sealer
Tools
- Shovel and rake
- Plate compactor
- Level and straightedge
- Rubber mallet
- Wet saw with a stone blade
- Broom and hose
Having the right materials prevents shortcuts later.
Step-by-Step Guide On How to Install Limestone Pavers
Here is how to install limestone pavers.
Step 1: Plan the Layout and Drainage
Planning the layout and drainage is the key aspect of limestone installation.
- Mark the patio area with stakes and string. Confirm the square by measuring diagonals.
- Plan a slope of about ⅛ inch per foot away from buildings.
- This slope will keep the water away from the surface and prevent pooling under the stone.
- Standing water damages limestone over time.
- Dry-lay a few pavers to preview spacing and layout before excavation.
Step 2: Excavate to the Correct Depth
Digging upto the depth depends on the climate and usage.
- The typical patio depth is about 7–9 inches in mild climates and 9–12 inches in freeze-thaw regions.
- Remove organic soil completely to prevent sinking.
- Compact the exposed subgrade, as limestone cannot sustain soft or shifting soil.
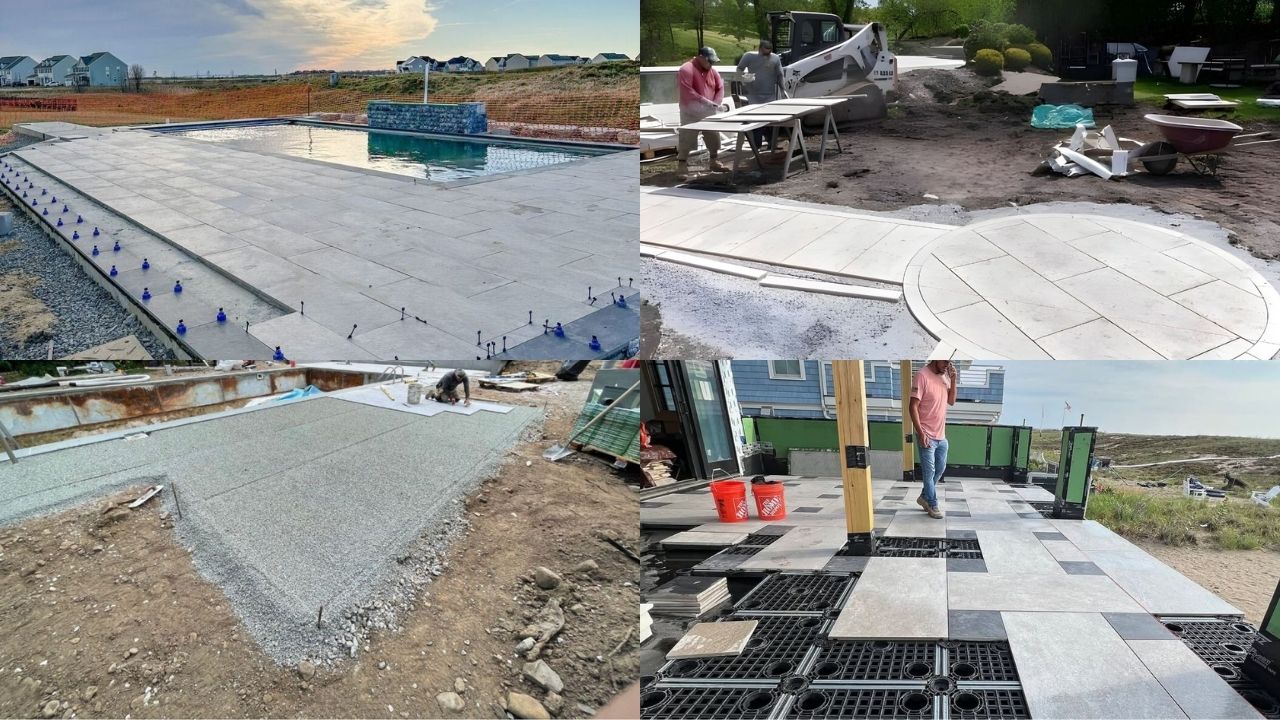
Step 3: Install and Compact the Crushed Stone Base
The 3rd step includes the installation and compacting of the crushed stone base.
- Spread crushed stone in 2-3 inch layers.
- Compact each layer thoroughly before adding the next. The target base depth includes 4-6 inches in warm climates and 6-8 inches in cold climates.
- Keep an eye on the slope during compaction.
- Correct if you find any issues.
- A strong base supports the stone for decades.

Professionals who install natural stone pavers professionally have teams of professionals familiar with limestone products. They treat the base and preparation as the most important step.
Step 4: Add the Bedding Layer
The bedding layer is crucial as it adjusts height and not structure.
For dry-laid patios:
- Use 1 inch of washed concrete sand
For mortar-set patios:
- Use a mortar bed over a concrete slab

Level the bedding layer to make it smoother. Don’t compact it and set the pavers immediately to avoid footprints or uneven spots.
Step 5: Place the Limestone Pavers
Once you are satisfied with the layout, place the limestone on the prepared surface.
- Start from a straight edge or corner.
- Place each paver gently onto the bedding layer.
Best practices:
- Set stones flush with neighbors
- Use a rubber mallet for adjustment
- Maintain even joint spacing
- Check the level every few rows
Lift and place each stone and don’t drag the limestone throughout sand. Dragging scratches the surface.
Cut pavers with a wet saw and clean edges preserve the natural look.
Step 6: Install Edge Restraints
Edge restraints prevent the sideways movement and add longevity.
Install restraints in the following areas:
- Around the entire perimeter
- Anchored into the compacted base
- Tight against the paver edge
This shouldn’t be overlooked as limestone pavers spread outward over time without proper edge restraints.
Step 7: Fill the Joints Properly
Joint material plays an important role in affecting drainage and stone health. For most patios:
- Use polymeric sand rated for natural stone
- Sweep sand carefully into the joints with the soft broom.
- Remove the excess from the surface and activate with light misting, and don’t spray extra.
For mortar-set limestone:
- Use breathable mortar designed for stone
- Avoid rigid mortars that trap moisture
- Allow joints to cure fully before sealing.
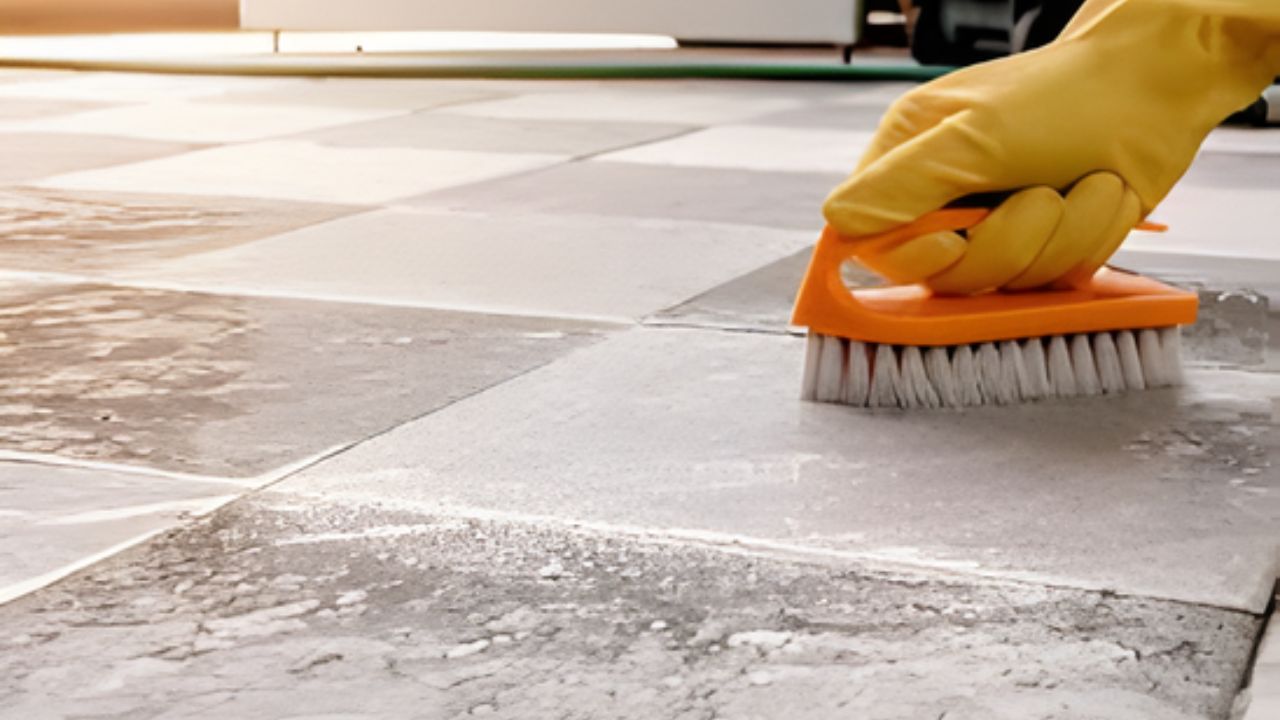
Step 8: Clean the Surface Safely
Now, clean the installed area before sealing. Clean it by using:
- Water
- Soft broom or brush
Avoid:
- Acidic cleaners
- Vinegar or bleach
- High-pressure washing
Limestone is sensitive towards acids, and even mild household cleaners can etch the surface.
Step 9: Seal the Limestone
Sealing is crucial for limestone as it protects it from moisture and stains.
- Opt for a penetrating, breathable stone sealer.
- Only use the sealer when the patio dries completely, usually 24–48 hours after installation.
- Sealing helps reduce water absorption, limit staining, and preserve natural color.
- Reapply every 2–3 years, depending on exposure.
What Are the Most Common Limestone Installation Mistakes?
Limestone failures are the result not of material itself but of installation of pavers mistakes rather than material defects. These errors are preventable with proper planning and execution.
| Installation Mistake | What Goes Wrong | Long-Term Impact |
| Skipping Base Compaction | An uncompacted base allows soil movement, causing limestone pavers to settle unevenly over time. | Surface lippage, shifting pavers, uneven walking areas |
| Installing Without a Proper Slope | Without slope, water pools on limestone surfaces and increases moisture absorption. | Staining, surface damage, and structural deterioration |
| Using Clay Soil as a Base | Clay soil retains water and expands when wet, creating instability beneath the pavers. | Cracking, joint failure, base collapse |
| Trapping Moisture Beneath the Stone | Poor drainage layers trap moisture under limestone instead of releasing it. | Efflorescence, freeze-thaw damage, weakened stone |
| Using Acidic Cleaners on Limestone | Acidic cleaners react with limestone’s calcium content and etch the surface. | Permanent dulling, surface erosion, loss of natural finish |
Can Homeowners Install Limestone Pavers Themselves?
Limestone pavers are soft and costly, which requires a professional approach to be installed. However, homeowners with technical knowledge may want to opt for DIY knowledge. However, diy installation works when:
- The area is small
- The site is flat
- Drainage is simple
Professional installation makes sense when:
- The patio sits near the foundations
- The site slopes
- The design includes steps or curves
Installation quality affects lifespan more than stone price.
Limestone Paver Installation FAQs
Let’s answer your questions about how to install limestone pavers.
How deep should the base be for limestone pavers?
6–8 inches of compacted crushed stone, plus bedding material.
Can limestone pavers be installed on sand?
Yes. By dry-laid patios, but only over a properly compacted crushed-stone base.
Do limestone pavers need sealing?
Yes. Sealing reduces moisture absorption and staining.
Are limestone pavers slippery when wet?
Textured or tumbled limestone offers good slip resistance. Finish matters.
How long do limestone pavers last?
Over a decade when installed and sealed properly.
Bottom Line
Limestone pavers provide a natural balance to outdoor spaces. However, their performance relies on preparation, not shortcuts. A stable base, controlled drainage, breathable joints, and proper sealing will protect the stone. When homeowners understand these steps, they make better choices.
A well-installed limestone patio does not just look good. Sourced from limestone pavers suppliers like NT Pavers, it stays level, drains well, and ages with quiet confidence.