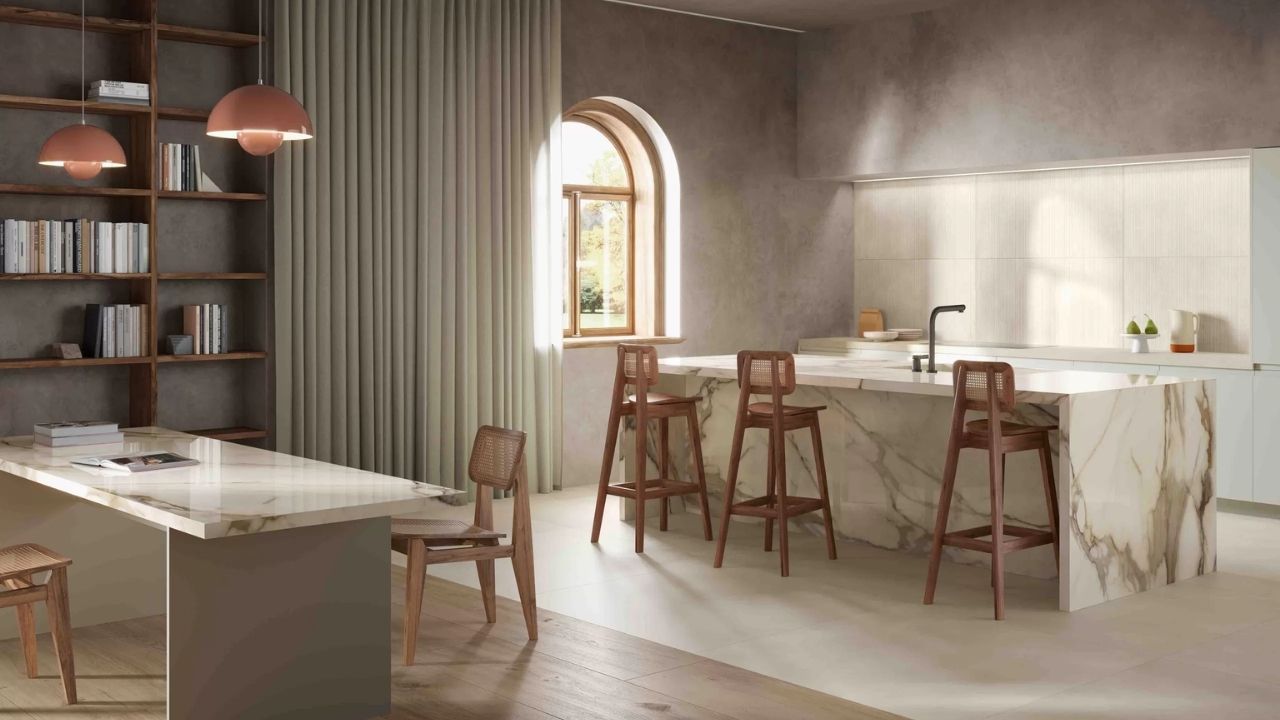
Limestone pavers are one of the most popular choices for homeowners who want their outdoor spaces have natural charm, warmth, and a durable surface. Unlike manufactured paving, limestone offers a subtle variation in texture and tone. This variation makes the patios and pool decks look natural and feel grounded but not rigid. These days, homeowners are now avoiding glossy surfaces and heat-retaining materials.

This is why they are gaining more popularity among homeowners. If you are curious too than this will help you understand limetsone pavers with every little detail so you can make an informed decision. The goal stays simple: help you decide if limestone suits your project.
What Are Limestone Pavers?
Limestone pavers are obtained from natural line which is a sedimentary stone formed from calcium carbonate. It is the result of marine organisms, pressure, and mineral deposits creating a dense stone. Builders can shape them into paving units according to their requirements.
Quarries extract limestone blocks, which are cut, finished, and sized by professional stone fabricators. Common finishes include honed, tumbled, brushed, and natural split. Each finish determine it’s look and feel underfoot.
Being a natural stone paver, limestone features natural variation rather than uniform color. Compared to porcelain pavers, limestone has a soft surface that stays cooler. These are some prominent features that make designers prefer limestone for outdoor living areas rather than purely functional spaces.
Where Limestone Pavers Are Used?
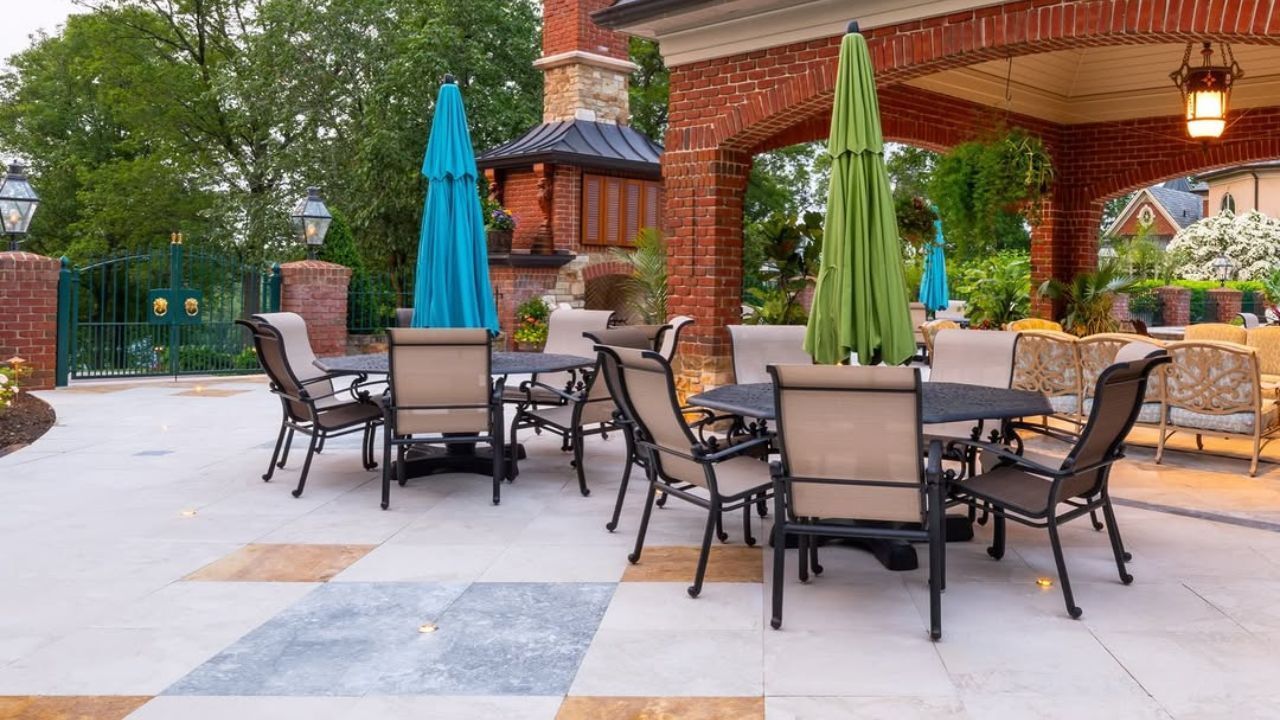
Limestone pavers perform well in areas where people relax, walk, and gather. The stone is a perfect blend of comfort, durability, and appearance. The stone balances comfort, durability, and appearance. Common residential uses include:
- Patios and outdoor seating areas where comfort matters
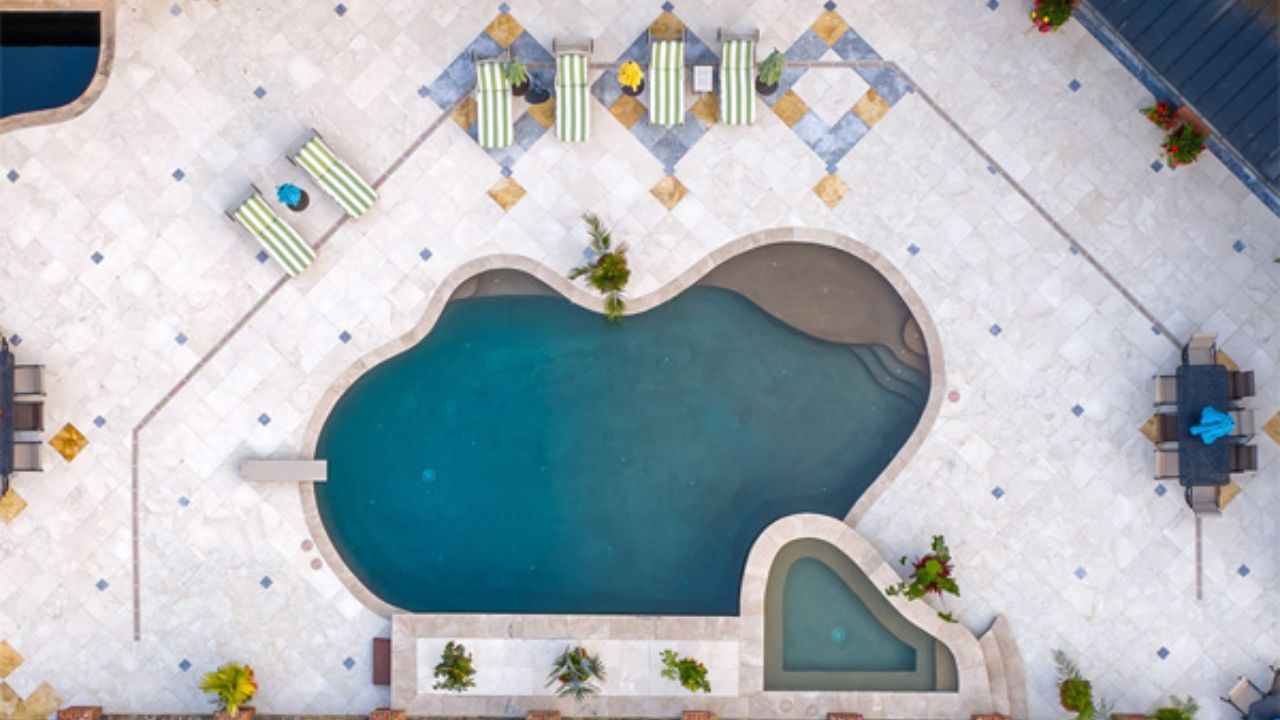
- Pool decks that need cooler surfaces and good traction
- Garden walkways and paths that blend with landscaping
- Courtyards and atriums that frame architecture
- Outdoor steps and entry areas with a welcoming feel
- Light-traffic driveways, when installed on reinforced bases
Commercial uses include:
- Hotel courtyards and terraces
- Restaurant patios
- Low-traffic plazas and shared spaces
Limestone works best where drainage is efficient and controlled. In freeze-thaw climates, installers should lay the base carefully and seal the surface to prevent moisture absorption.
What Are The Pros and Cons of Limestone Pavers?
Though limestone is a good choice as a natural stone with distinct benefits, it is not perfect. It also has some drawbacks. Here are the pros and cons of the limestone pavers to understand.
| Pros Of Limestone Pavers | Cons Of Limestone Pavers |
| Natural appearance that blends with plants and architecture | Porous structure absorbs moisture without sealing |
| Cooler surface temperature than concrete and porcelain | Sensitive to acidic substances like vinegar and citrus |
| Textured finishes that improve slip resistance | Requires periodic sealing to protect against stains |
| Wide size range, including large-format slabs | Higher upfront cost than concrete pavers |
| Repair-friendly installation compared to poured concrete | — |
| Strong resale appeal due to natural stone perception | — |
| Develops a soft patina over time instead of sharp wear marks | — |
These trade-offs make limestone better suited for feature areas than low-maintenance utility zones.
What Are The Limestone Paver Sizes and Thickness?
Limestone pavers are available in both modular sizes and large-format slabs. Different sizes are used according to the project requirements. Size choice affects layout, cost, and installation method.
Common Limestone Paver Sizes
- 400 × 400 mm
- 600 × 400 mm
- 600 × 600 mm
- French pattern sets with mixed sizes
- Large-format slabs up to 900 × 600 mm and larger
For small spaces or traditional layouts, large slabs give a spacious feel with fewer grout lines and joints. Smaller formats suit traditional layouts.
Typical Thickness Options
- 20–30 mm is ideal for patios and walkways installed on mortar beds
- 30–40 mm is well-suited to outdoor living areas with moderate foot traffic
- 50 mm or more for Driveways and commercial paving
Choosing the correct thickness matters more than size. Thick outdoor pavers resist movement, shifting, and cracking under load over time.
What Is The Limestone Paver Cost and Installation Pricing
Prices vary by stone origin, finish, thickness, and grading quality.
Limestone Paver Cost (Material Only)
Here is the limestone paver pricing for the material only:
- Entry-level limestone pavers: $6–$12 per sq ft
- Premium or imported limestone: $12–$20+ per sq ft
Color consistency, cut accuracy, and finish quality often cause the price differences.
Limestone Pavers Installation Cost
Installation costs depend on base preparation, drainage, and setting method.
- Sand-set installation: $10–$18 per sq ft
- Mortar-set installation: $18–$30 per sq ft
Mortar-set installations cost more but offer greater stability for patios and pool decks.
Limestone Pavers vs Other Common Paving Materials
Limestone pavers are already a popular material for paving projects, but where does it stand compared to other paving materials? Take a look at this table to learn about this.
| Feature / Criteria | Limestone Pavers | Porcelain Pavers | Concrete Pavers | Travertine Pavers | Sandstone Pavers | Bluestone Pavers |
| Material Type | Natural sedimentary stone | Manufactured ceramic | Manufactured concrete | Natural limestone-based stone | Natural sedimentary stone | Natural igneous stone |
| Appearance | Soft, natural variation; timeless | Highly consistent; modern | Uniform; engineered look | Natural with visible pores | Warm, earthy variation | Bold, dramatic tones |
| Design Styles | Classic, Mediterranean, contemporary | Modern, minimalist | Traditional, suburban | Resort-style, luxury | Rustic, traditional | Architectural, premium |
| Surface Temperature (Sun) | Cool underfoot | Warm to hot | Moderate | Cool | Cool | Can get warm |
| Slip Resistance | Good (textured finishes) | Excellent (R11+ options) | Good | Very good (tumbled) | Good | Moderate–good |
| Maintenance Needs | Moderate (sealing advised) | Very low | Low | Moderate (sealing required) | Moderate | Low–moderate |
| Stain Resistance | Moderate | Excellent | Moderate | Low–moderate | Moderate | Good |
| Repairability | High (easy to replace) | Low (slab matching issues) | Medium | High | High | Medium |
| Durability | High | Very high | Medium | Medium–high | Medium | High |
| Freeze–Thaw Performance | Good (proper grade) | Excellent | Moderate | Moderate | Moderate | Excellent |
| Longevity | High (decades with care) | Very high (50+ years) | Medium | Medium | Medium | High |
| Installation Flexibility | Sand-set or mortar-set | Pedestal, mortar, adhesive | Sand-set | Mortar or sand-set | Sand-set or mortar | Mortar preferred |
| Cost Range | Mid to high | High | Low to mid | Mid | Mid | High |
| Best Use Areas | Patios, pool decks, walkways | Rooftops, pools, terraces | Driveways, patios | Pool decks, courtyards | Paths, patios | Patios, steps, accents |
Limestone pavers farewell suited for homeowners who prefer a natural, cool surface for their outdoors, classic aesthetics, and easy repairability.
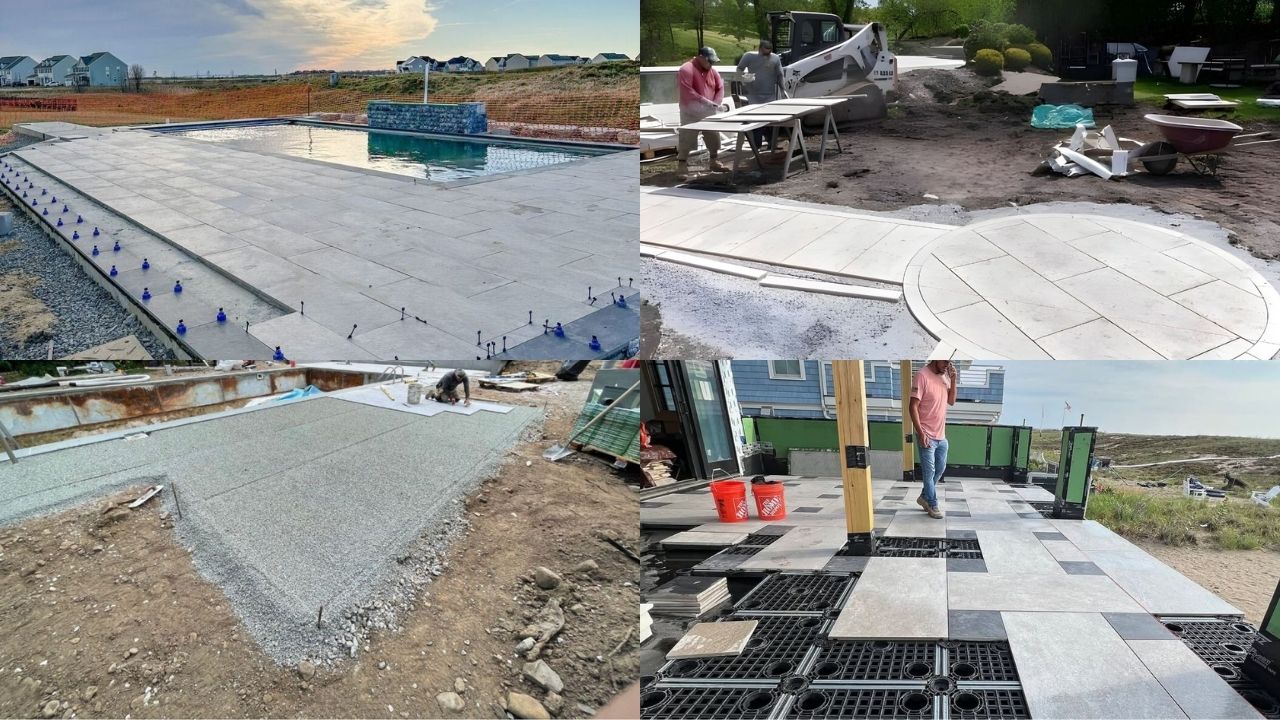
Step-by-Step Guide On How to Install Limestone Pavers
Limestone pavers are installed with two methods: dry laid and mortar methods. Here are two methods in step by step guide.
(Dry-Laid Method)
Firs lets discuss the dry-laid method.
Step 1: Plan the Layout and Slope
Step 1 of how to install limestone pavers is planning the layout and slope.
- Start by planning the layout.v
- Define finished height, pattern, and slope.
- Limestone surfaces need to slope away from structures around one-quarter inch per foot. This slope prevents water from pooling or migrating under the pavers.
- The dry-laid limestone installation method requires careful edge planing.
- Installers usually decide early where cuts and restraints will sit to prevent narrow slivers of stone.
Step 2: Excavate the Area
Step 2 of how to install limestone pavers is excavating the area.
- Dig the area at the proper depth. Typical excavation includes:
- Limestone thickness
- Bedding layer thickness
- Crushed stone base thickness
- When considering pedestrian areas, base depth usually ranges from 6 to 8 inches, depending on soil conditions.
- Poor soil requires deeper excavation.
- Remove any organic material from the surface.
- Soil that contains roots or topsoil cannot support stone.
Step 3: Install and Compact the Crushed Stone Base
Step 3 of how to install limestone pavers is installing and compacting the crushed stone base.
- Start by using angular crushed stone, but don’t use rounded gravel.
- Angular stone locks together when compacted.
- Install the base in layers no thicker than three inches.
- Compact each layer thoroughly with a plate compactor.
- Skipping compaction causes settling later.

A stable base distributes load evenly across the limestone surface.
Step 4: Add the Bedding Layer
Step 4 of installing limestone pavers involves adding the bedding layer.
- Spread an inch layer of bedding sand or stone screenings.
- Make it flat with the guide rails and avoid walking on the flat surface.

The bedding layer allows fine adjustment. It does not replace base compaction.
Step 5: Lay the Limestone Pavers
Step 5 of how to install limestone pavers is laying the limestone pavers.
- Now place the limestone gently onto the bedding layer.
- Don’t slide them into place.
- Place each paver level with the next stone.
- Keep the space joints consistent.
- Maintain consistent joint spacing. Most limestone installations use joints between one-eighth and three-eighths of an inch.
- Cut stones as needed using a wet saw designed for natural stone.
Step 6: Install Edge Restraints
Step 6 of how to install limestone pavers is installing edge restraints. This matters a lot because it holds the system together. Without restraint, pavers drift over time.
Use:
- Aluminum or PVC edging for straight runs
- Concrete curbing for high-load edges
Secure restraints firmly to the base.
Step 7: Fill the Joints
Step 7 of how to install limestone pavers is filling the joints. This will prevent the paver from shifting over time.
- Sweep joint material into the gaps.
- Many installers use polymeric sand rated for natural stone.
- Follow the manufacturer’s moisture and curing requirements carefully.
Proper joint filling locks pavers together and limits weed growth.
Step-by-Step Guide On Mortar-Set Limestone Installation
Let’s discuss the mortar-set limestone installation method.
Step 1: Prepare the Concrete Base
Start by creating the concrete base.
- Make sure that the concrete is cured fully before installation.
- The surface should slope correctly and remain clean.
- Installers often apply a bonding slurry or primer to improve adhesion.

Step 2: Apply Mortar or Thinset
- Opt for mortar rated for outdoor natural stone.
- Evenly spread using a notched trowel.
- Work in small sections to maintain bond strength.
Step 3: Set the Limestone Pavers
- Now press each paver firmly into the mortar bed.
- Keep an eye on the slope and alignment frequently.
- Maintain consistent joint width.
Step 4: Grout and Cure
- Fill the joints with flexible grout that is suitable for outdoor stones.
- Wait for proper curing before exposure to water or foot traffic.
Sealing the limestone Pavers
Once the pavers are installed, seal the surface with a penetrating sealer. This will keep the surface secure from scratches, staining, and moisture absorption.
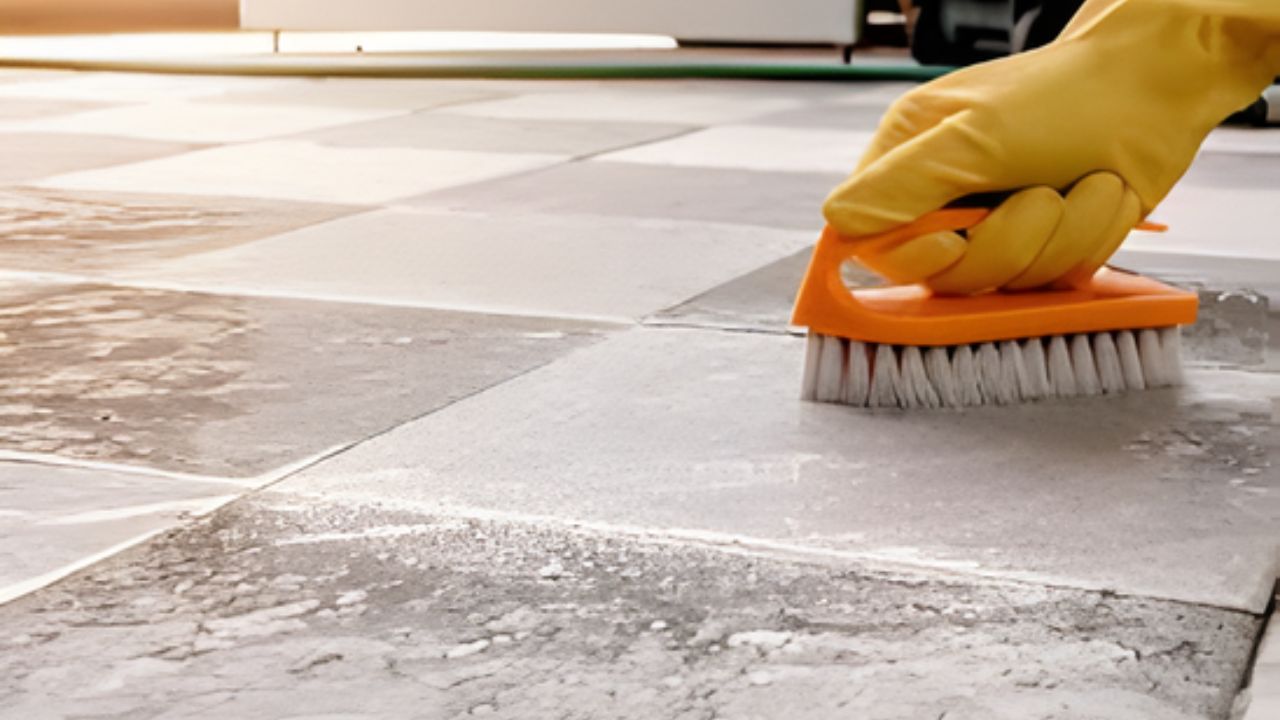
What Are The Maintenance and Sealing Requirements For Limestone Pavers
Limestone pavers require regular but manageable care.
Routine Maintenance for Limestone Pavers
Routine maintenance and cleaning limestone pavers includes:
- Sweep debris to prevent surface abrasion
- Wash with pH-neutral stone cleaner
- Rinse after exposure to pool water or dirt
Sealing Guidelines For Limestone Pavers
Sealing adds longevity to the paver surface, and it also secures the surface from daily wear and tear.
- Seal after installation and curing
- Reapply every 1–2 years, depending on exposure
- Use penetrating sealers for natural finishes
- Use enhancing sealers to deepenthe color tone
Sealing reduces staining, limits moisture absorption, and simplifies cleaning.
Limestone Pavers FAQs
Let’s answer your commonly asked questions about Limestone pavers.
Are limestone pavers slippery when wet?
No. If you select the textured finishes than you can enjoy good traction when sealed with non-gloss sealers.
Can limestone pavers be used around pools?
Yes. Once they are sealed, they will sustain water absorption, stay cool, and perform well longer.
Do limestone pavers crack easily?
No. When they are installed on proper compacted base and correctly, then cracking is nearly impossible for years to come.
How long do limestone pavers last?
Properly installed limestone can last several decades.
Do limestone pavers need sealing?
Yes. Sealing protects against moisture and staining.
Is limestone better than concrete pavers?
Yes. Limestone offers better appearance and comfort, while concrete costs less.
Bottom Line
Limestone pavers are a perfect blend of natural beauty, comfort underfoot, and durability. They suit patios, pool decks, and outdoor living areas. When sourced from trusted suppliers like NT Pavers, you can ensure high-quality stone and consistent finishes. They need to be installed on a properly compacted base and sealed. After this, they will not crack and will stay functional for years to come. Just make sure to select the right thickness and finish for the matching application and best results.