How to lay ceramic tiles? As a DIY enthusiast, this can be an intriguing question for you. DIY ceramic tile installation indoors or outdoors can be a rewarding moment if they are laid well on the surface. After all, the well-placed ceramic tiles create an even surface to walk on that looks aesthetically great as well. This post will provide you with guidance for every step to lay ceramic tile. Keep reading to learn how to lay ceramic tile and complete a professional floor installation.
Key Takeaways
- Surface preparation is as important as laying tile.
- A proper layout plan is compulsory to avoid awkward cuts or uneven gaps.
- Select the suitable mortar and grout according to the function of the room.
- Let the mortar cure first before grouting or walking on the surface.
- Follow consistent techniques with basic tools.
- Don’t skip the sealing if the area is prone to moisture or staining.
Equipment / Tools Required To Lay Ceramic Tile
- Tile cutting tool (either a wet tile saw or a rail tile cutter, also known as a snap tile cutter)
- Tile nipper
- Rubber tile float
- Notched tile trowel
- Flat margin trowel
- Rubber mallet
- Tile spacers
- Large sponges
- Buckets
- Tape measure
- Chalk line
- Bubble level
- 2×4 scrap lumber
- Framing square
- Safety glasses
- Rubber gloves
Materials To Lay Ceramic Tiles
- Tile
- Thinset mortar
- Tile grout
- Grout haze remover
- Grout sealer
- Cement backer board
- Fiberglass seam tape
Plan Your Layout Carefully
Step 1 of how to lay ceramic tile:
This is the most important part of installing ceramic tile flooring. Proper planning will ensure that there will be no uneven rows or improper cuts.
- Start by measuring the entire space.
- Use chalk to divide the floor or wall into quadrants. This will help you to start tiling from the center and work outward.
- Make sure the layout is symmetrical.
- Before adding mortar, dry-fit your tiles.
You can have an idea of the tile layout and even adjust the layout accordingly.

Prepare the Surface
Step 2 of how to lay ceramic tile:
You will need a clean, level, and dry surface. This can be concrete, cement board, or even an old tile surface in good condition. Different surfaces require different preparation, such as:
- Concrete will require you to fill the cracks, remove dust, and ensure it is fully cured.
- For a wood subfloor, you will need to add a cement board underlayment to reduce flex.
- For existing tiles, you should sand the surface and use a bonding agent before applying mortar.
- If the base is uneven, tiles will crack. If it’s dusty or oily, they won’t stick. Skipping base prep will result in wasted time and materials.

Dry-Fit the Tiles
Step 3 of how to lay ceramic tile:
Before installing your ceramic tile, I would recommend that you dry-fit your tile on the prepared surface by starting from the center of the room. This will help you to have a clear idea about the location of the tile, the placement look, and the final idea about the space.
- Measure all walls from the middle to determine their center points.
- Create a cross pattern by snapping chalk lines between opposing walls.
- The arms of the cross can be tiled without mortar or grout.
Cut Tiles to Fit
Step 4 of how to lay ceramic tile:
You will need to cut the tiles to adjust them in the layout accordingly. Knowing how to cut tile properly is essential for achieving clean, accurate results. Use a manual tile cutter for straight cuts. For curved or edge cuts, you can use a wet saw. Creamic, like porcelain tile, is generally thicker, which is why you will need to work slowly. You’ll probably need to trim to lay the tile to fit around cabinets, walls, or pipes as well.

Mix and Apply Mortar
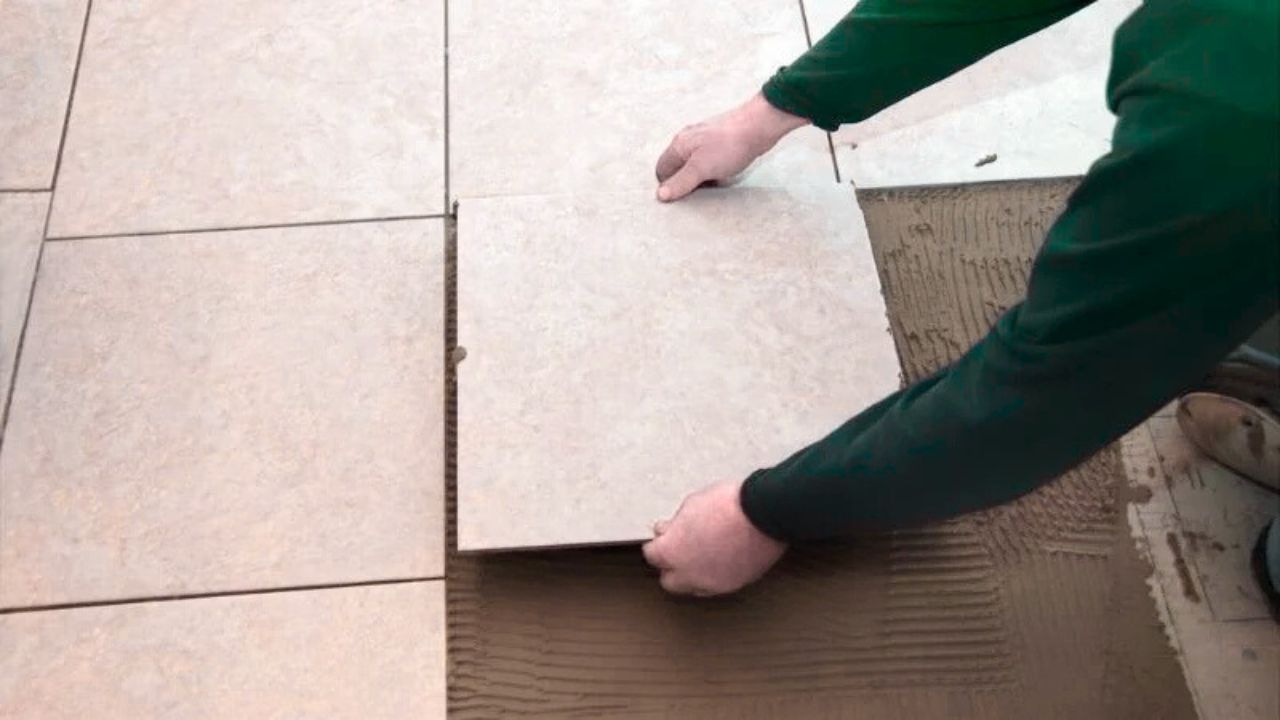
Step 5 of how to lay ceramic tile:
Select a thin-set mortar fr ceramic tiles. Spread the mortar with a notched trowel, holding it at a 45-degree angle.
- Spread only mortar on the tile, which will be consumed in 15 minutes.
- Press the tile firmly with a slight twist to set it.
- Check for levelness as you go and look for small errors that grow fast.
- Consider the type of mortar for the room you are about to lay ceramic tile.
- Rooms prone to moisture require water-resistant adhesive.
- Once all the tiles are placed, do not step on them for at least 24 hours.
- It usually takes a 24-hour for the layer of thinset mortar to sit.
- Tiles won’t come off even after heavy use with the right mortar.

Grout the Joints
Step 6 of how to lay ceramic tile:
Grout in the joints fills the gaps between tiles and provides strength to the structure. Use unsanded grout for joints under ⅛”, and sanded grout for wider joints.
- Mix the grout to a peanut butter consistency.
- Apply using a rubber float at a 45-degree angle.
- Wipe off excess grout with a damp sponge before it hardens.
- Wait for 72 hours so the grout will be cured completely.
- Do not expose it to water or heavy use. cement board
- Use a second sponge to wipe the excessive grout and haze from grout lines.

Seal (If Necessary)
Step 6 of how to lay ceramic tile:
Ceramic tiles are mostly non-porous, but grout is not. Use a penetrating grout sealer for bathrooms, kitchens, or any damp area is recommended.
- Let the grout fully cure for 72 hours.
- Apply sealer using a brush or applicator bottle.
- Wipe off any excess before it dries on the surface of the tile.
Sealing prevents mold, stains, and water damage, especially in high-traffic or splash zones.
Final Touches For Tile Floor
Step 7 of how to lay ceramic tile:
Install the fixture once the tiles are all set, grout is fully cured, and sealing is done. You can install a new baseboard if required. Wait for a few days to prepare the ceramic tile for heavy use. Once everything is dried and set then your ceramic floor is ready to use.
Ceramic Tile Installation Mistakes To Avoid
When you’re looking for tips on how to lay ceramic tiles, keep these mistakes as well for the best result:
- Do not skip the layout plans. This will result in unsightly gaps or slivers of tile.
- Uneven mortar application may result in tile popping over time or cracks.
- Clean the excess grout quickly to prevent the stubborn haze.
- Walking on tiles too soon can crack or even break the bond and shift placement.
- Skipping the layer in moisture-prone areas promotes mold growth.
Bottom Line on Laying Floor Tile
Here you have our guide about laying ceramic tiles all by yourself. After reading and following this guide, you should have an even surface to walk on, which has your desired ceramic tiles installed. This can be a rewarding moment for you, knowing you have done it all by yourself with minimal damage (depends).
Though it is generally easier to install the ceramic tiles but it is better to learn how to install outdoor tile for the floor and wall. Just make sure to get the best ceramic tiles from brands like NT Pavers to create a stunning look.